Add A Contact Form And Read Messages
Goal: Let visitors write to you, and know where their messages land.
Time: 4 minutes
You need: A page, and someone who should receive the mail
Steps
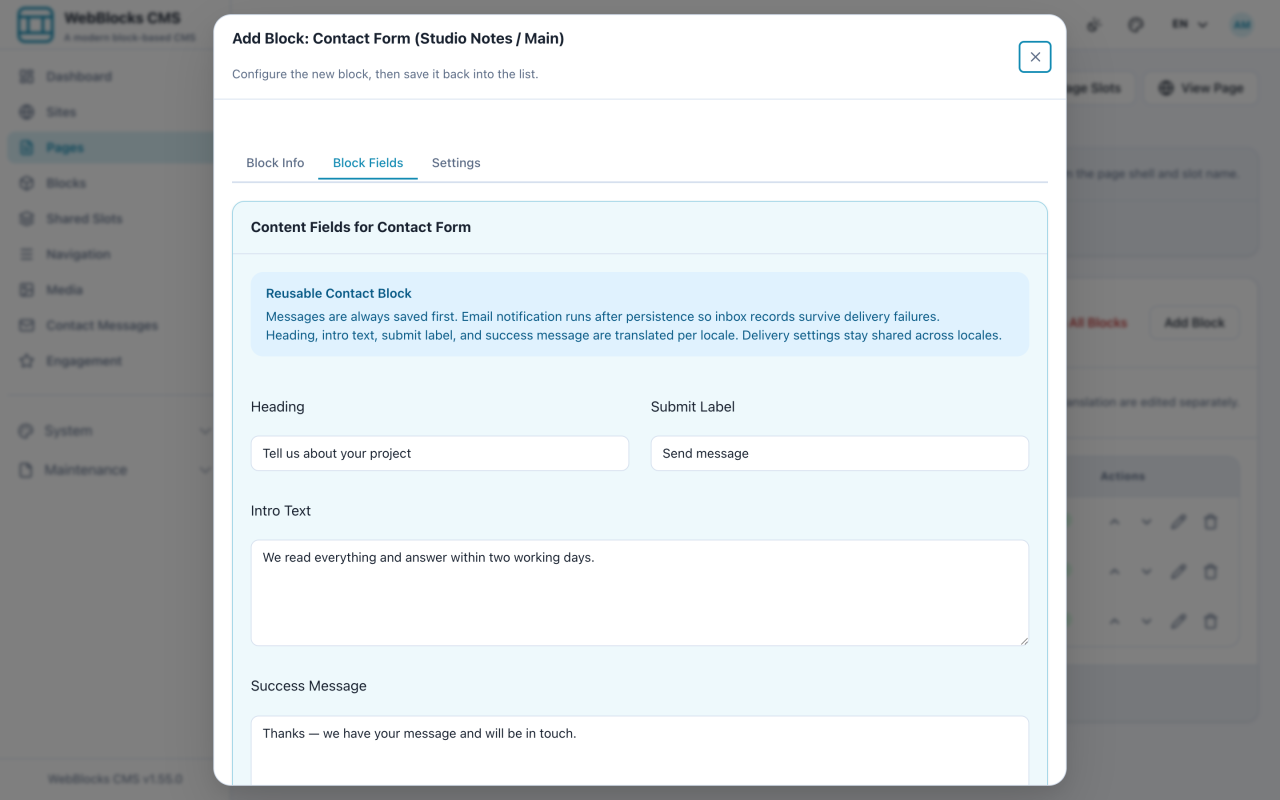
- In the Main slot, select Add Block, then choose Contact Form.
- Fill in the copy: Heading, Intro Text, Submit Label, and the Success Message shown after sending.
- Under Delivery Settings, leave Send email notification on. Use Recipient Email Override only when this one form should go somewhere other than the site's usual address.
- Under Consent, turn on Require a consent checkbox if you need one, and write the Consent notice next to it.
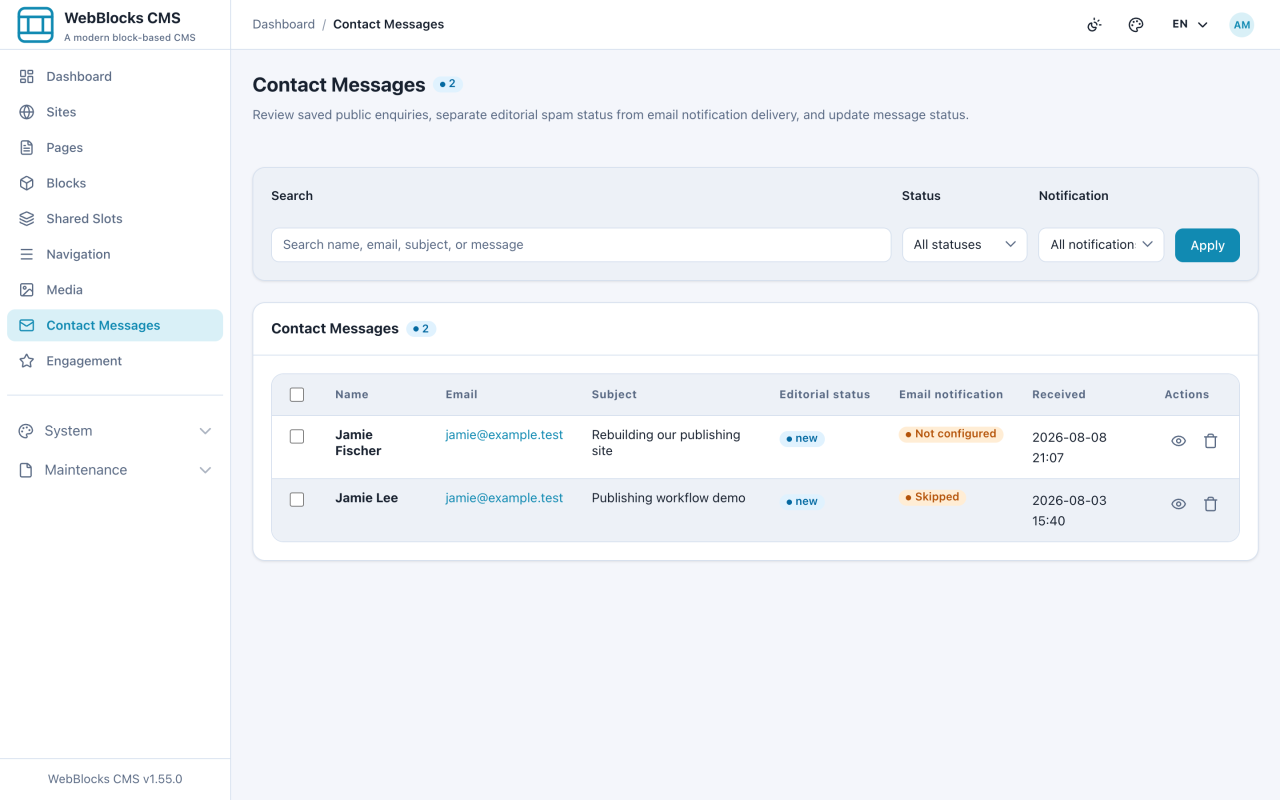
- Select Save New Block. Messages arrive in Contact Messages.
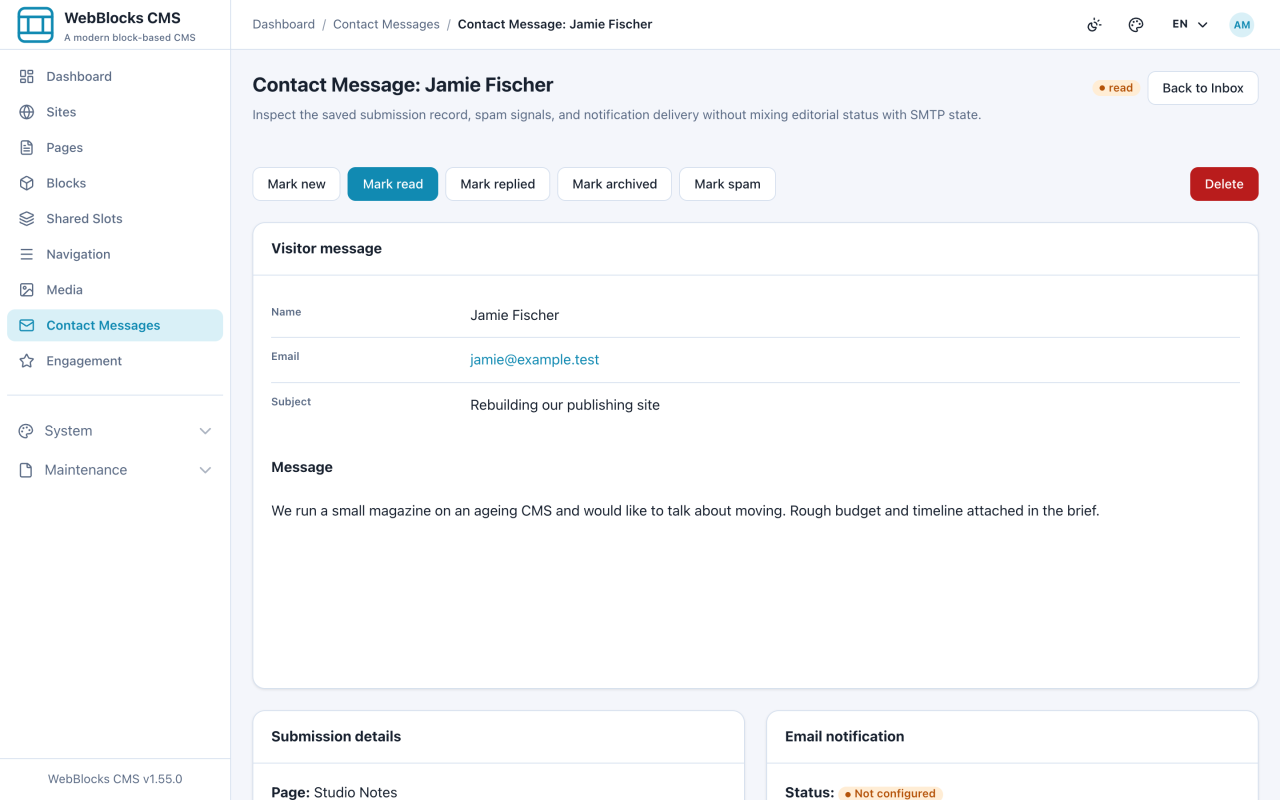
- Open one to read it in full, mark it read, replied, spam, or archived, and see whether the email notification actually went out.
Where The Mail Goes
The recipient is resolved in order: the block's Recipient Email Override, then the site's contact recipient, then the installation's configured fallback.
Set it on the site, not on every block. Overrides are for the one form that genuinely belongs to someone else — a jobs page going to a different inbox.
Notes
- The message is stored whether or not the email arrives. The detail screen separates the two, so a delivery problem never means lost enquiries.
- Forms carry a timing and honeypot check. A submission made faster than a human could type is refused.
- Write the Success Message as a promise you keep. "We will be in touch" sets an expectation; "Message received" sets none.
- The consent notice is your text, not boilerplate the CMS writes for you. If you collect it, say what you are collecting and why.