Upload Files To The Media Library
Goal: Put a file into the Media Library with the details filled in.
Time: 2 minutes
You need: A file, and Media access
Steps
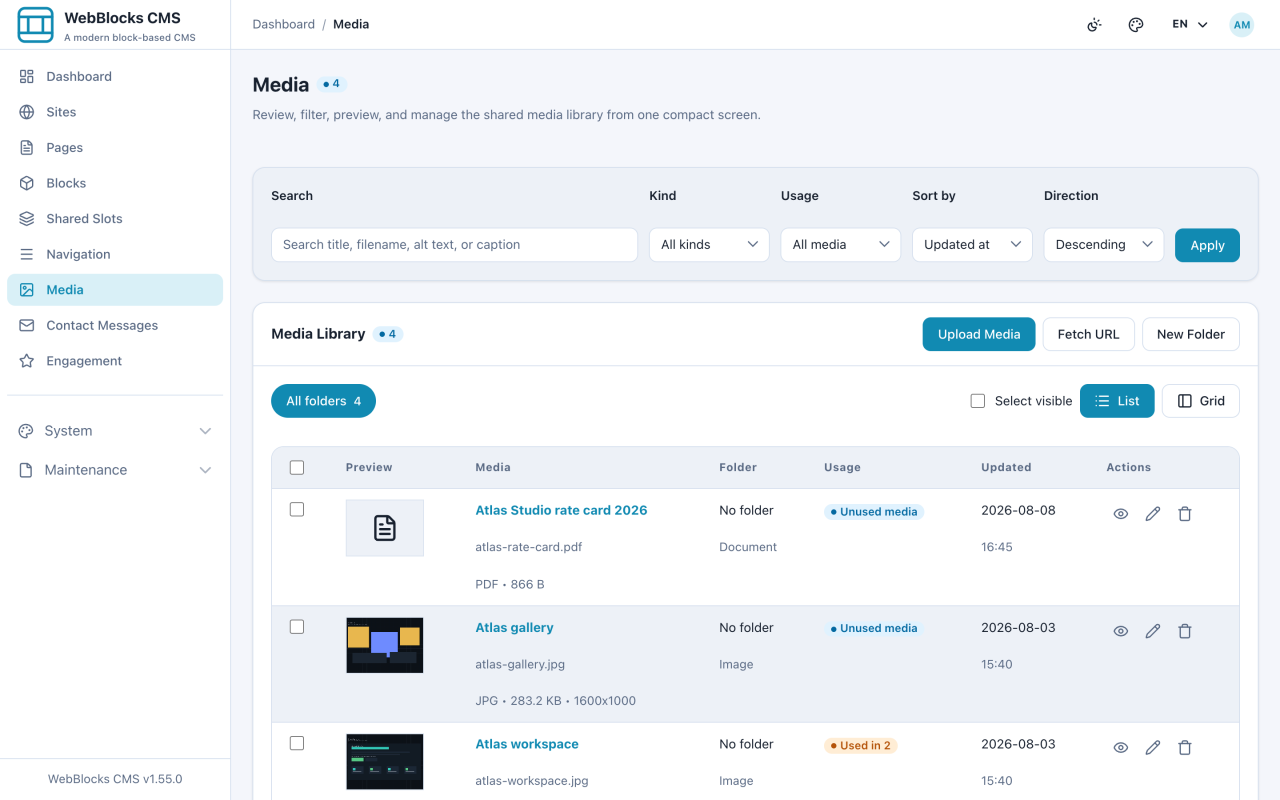
- Select Media in the sidebar. The library lists everything already uploaded, with filters for Search, Kind, Usage, and sorting.
- Select Upload Media.
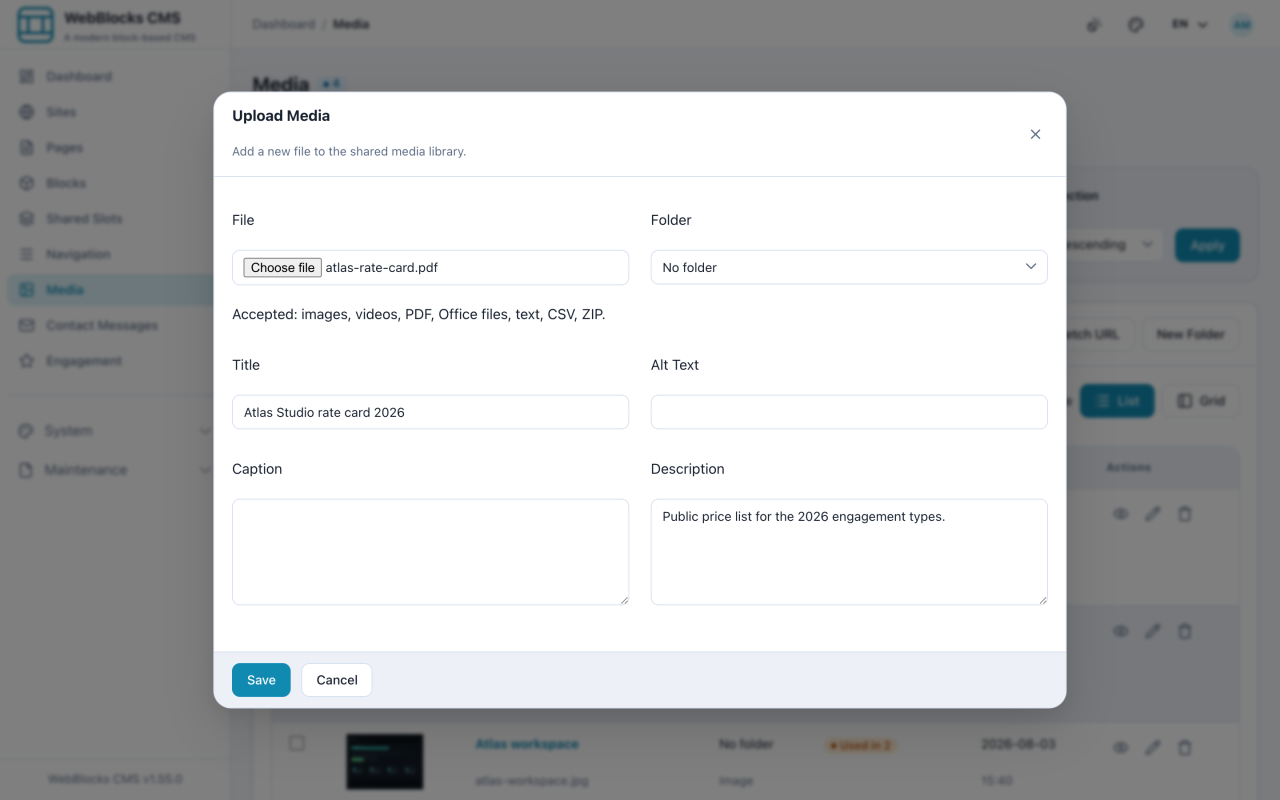
- Choose the File, then fill in what you know: Folder, Title, Alt Text, Caption, Description.
- Select Save.
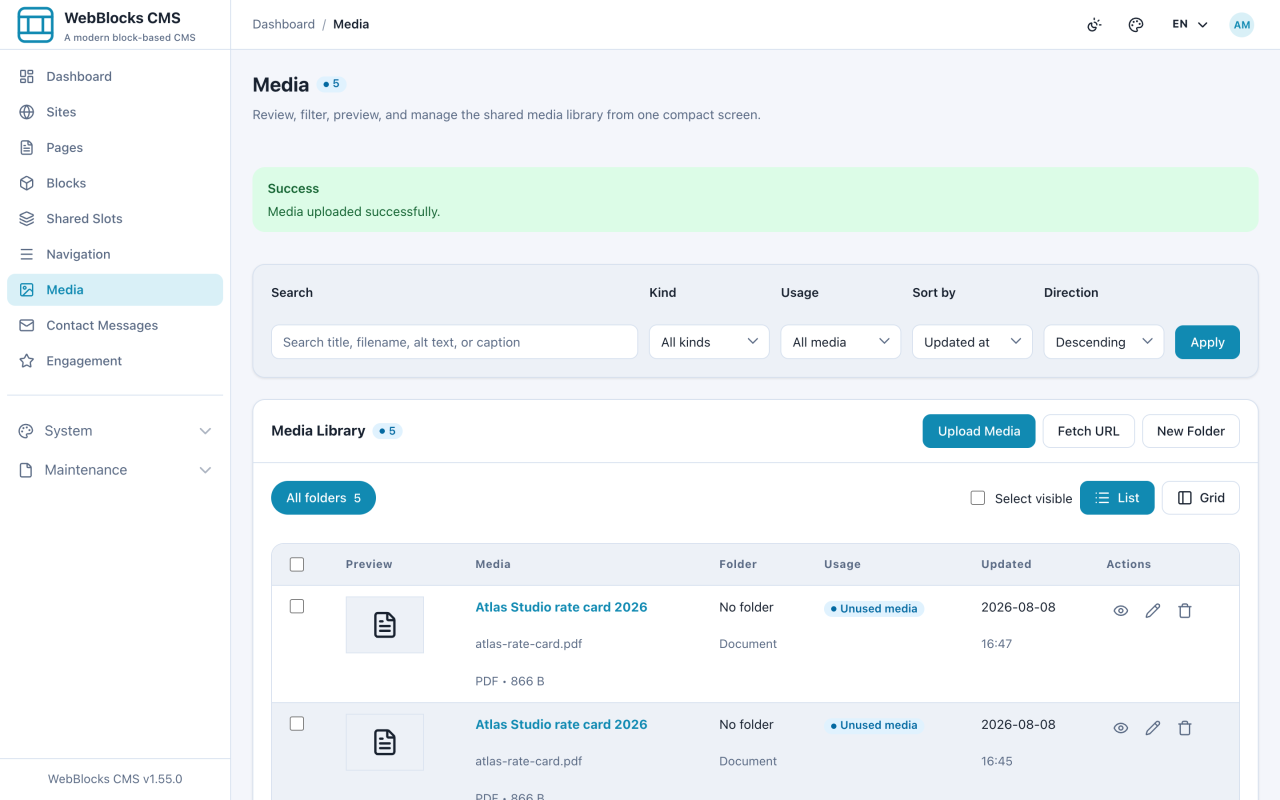
- The file appears at the top of the library, with its type, size, and a Usage badge showing where it is used.
Notes
- Fill in Alt Text at upload time for images. It travels with the file, so every block that uses it starts with a sensible default instead of nothing.
- Title is what you and your colleagues search for later.
atlas-rate-card.pdfis a filename;Atlas Studio rate card 2026is a title. - Upload the largest good-quality version of an image you have. The CMS derives the smaller sizes it needs.
- Fetch URL pulls a file from an address instead of your disk. Same result, no download-then-upload dance.
- The library is shared across the whole installation, not per page. Upload once; use it in as many places as you like.